Make your own statement t-shirt
A blog by Makeitup - The Agency
25. August 2017
The statement t-shirt is a top trend this year. You see everything from political messages to just plain fun on the runway and on the streets. You can find them in all price ranges and from many different brands. If you want to be truly unique you can also customize your own. Here’s how you do it:
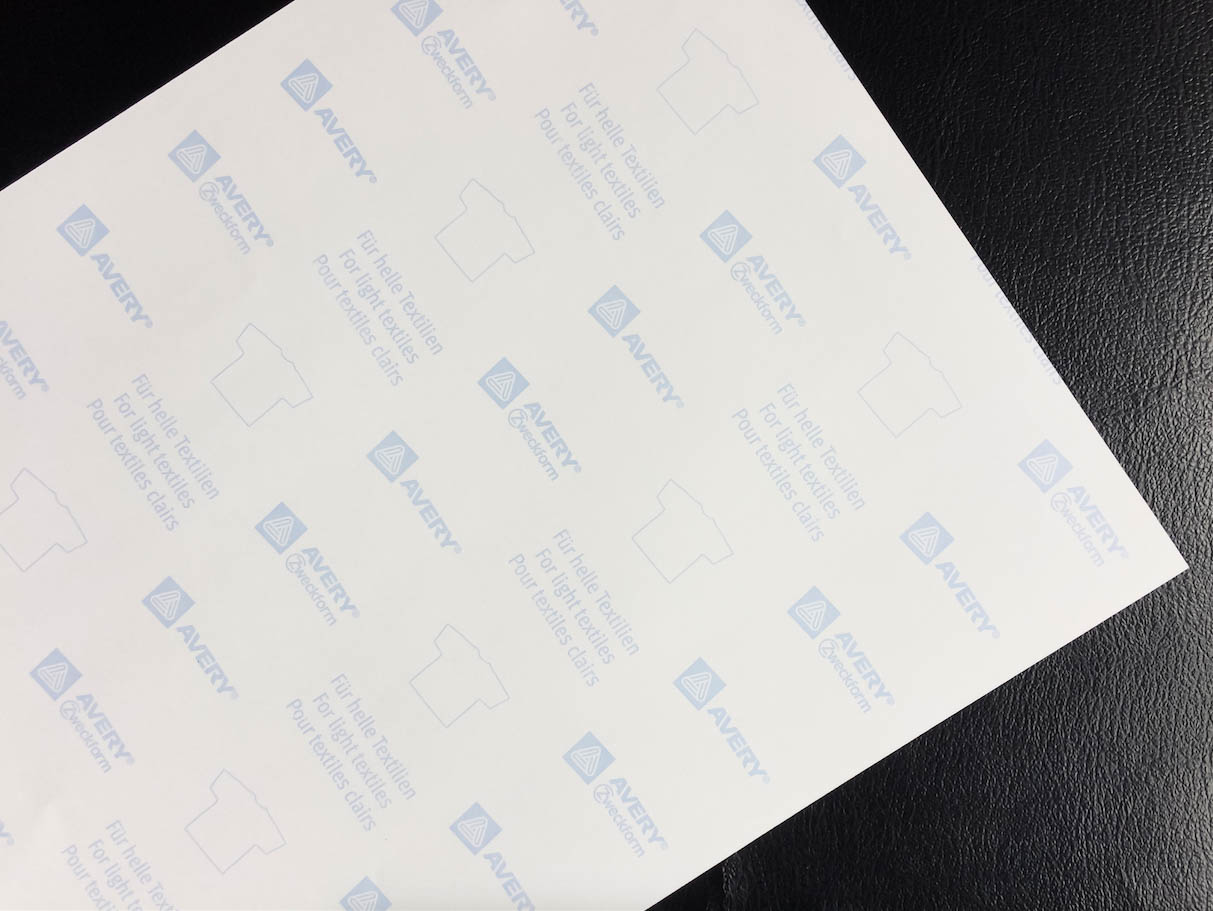 1. Purchase t-shirt transfer sheets at your local print store. I use “T-shirt transfers for light textiles” by Avery Zweckform.
 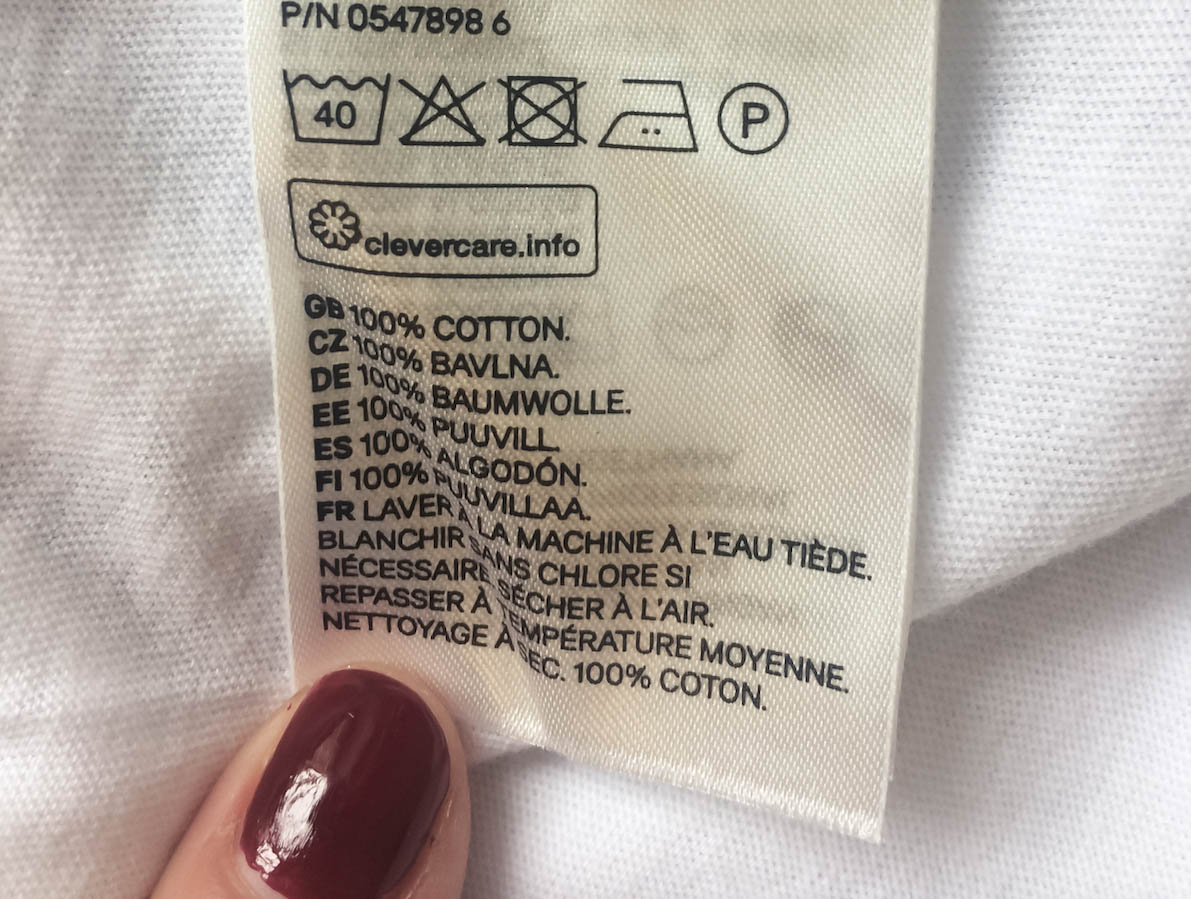 2. Pick out a t-shirt made of 100 % cotton. The material is important, if the fabric contains elastane, the transfer of the print might not be successful.
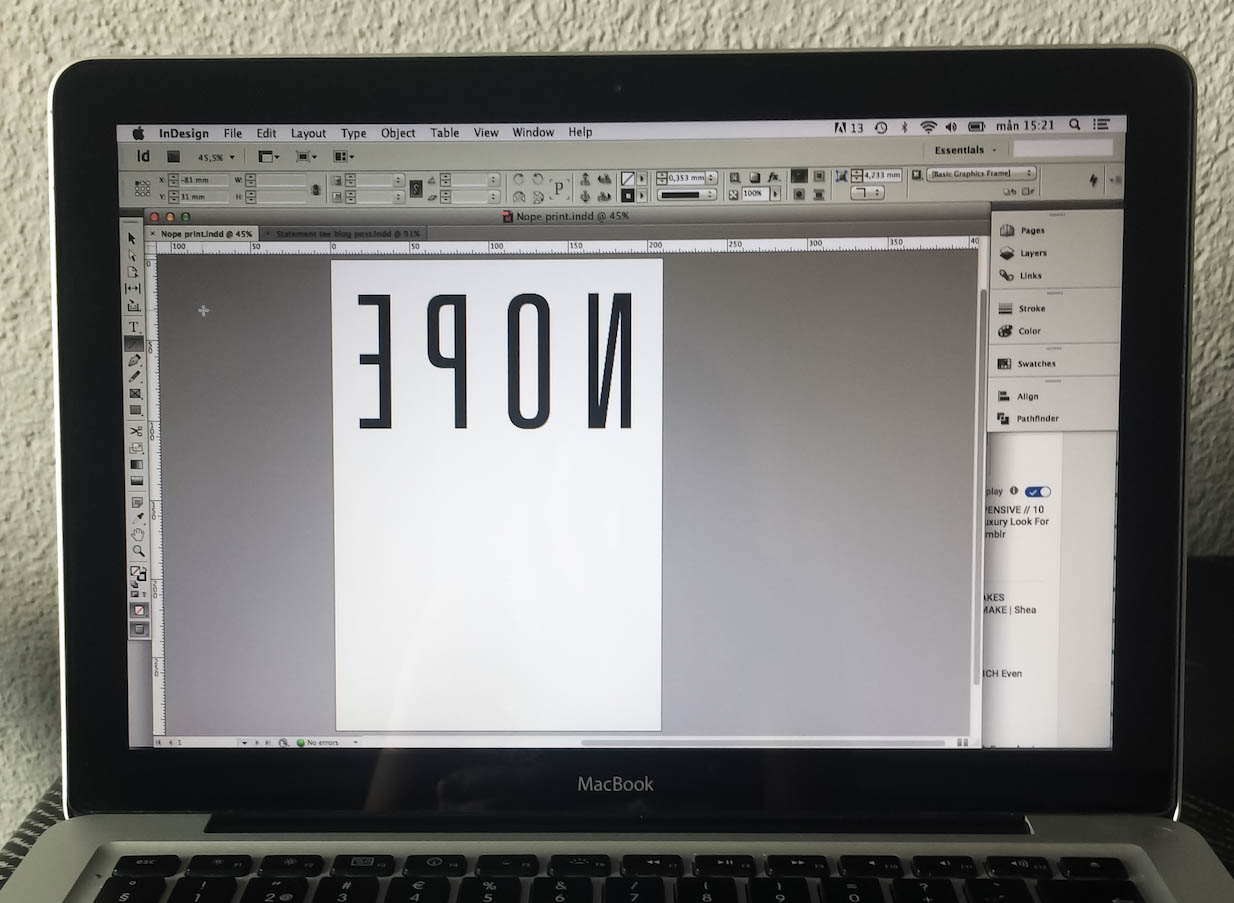 3. Make your print with the computer software of your choice. I use Adobe InDesign but you can also write your text in Microsoft Word for example. When you’re happy with your design, don’t forget to flip the text before you move on to the next step. Otherwise the text will be ironed on backwards.
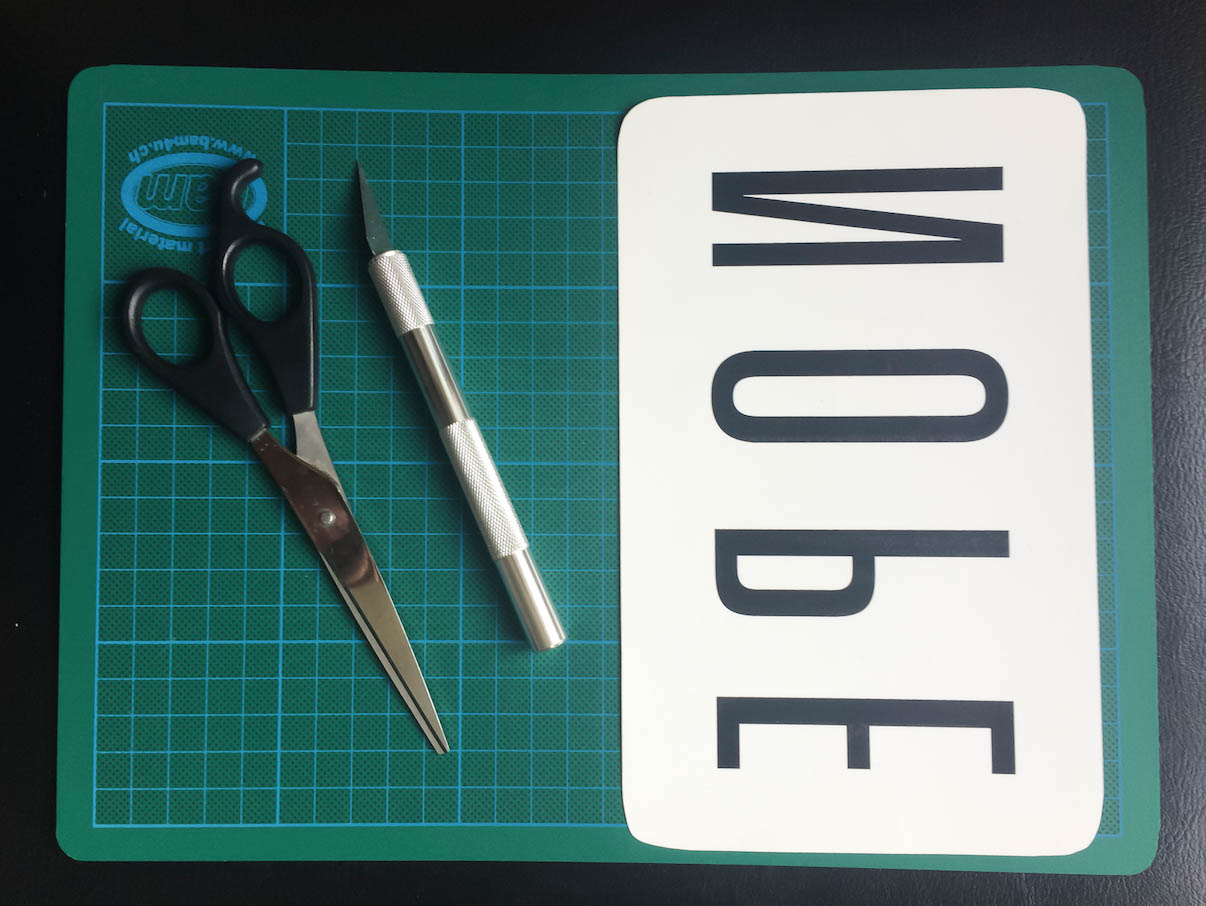 4. Print the text onto the transfer sheet. You might want to crop the paper slightly, depending on how much text you have but make sure to leave a margin around your print and make the corners rounded. Sharp edges might make the print come of more easily.
 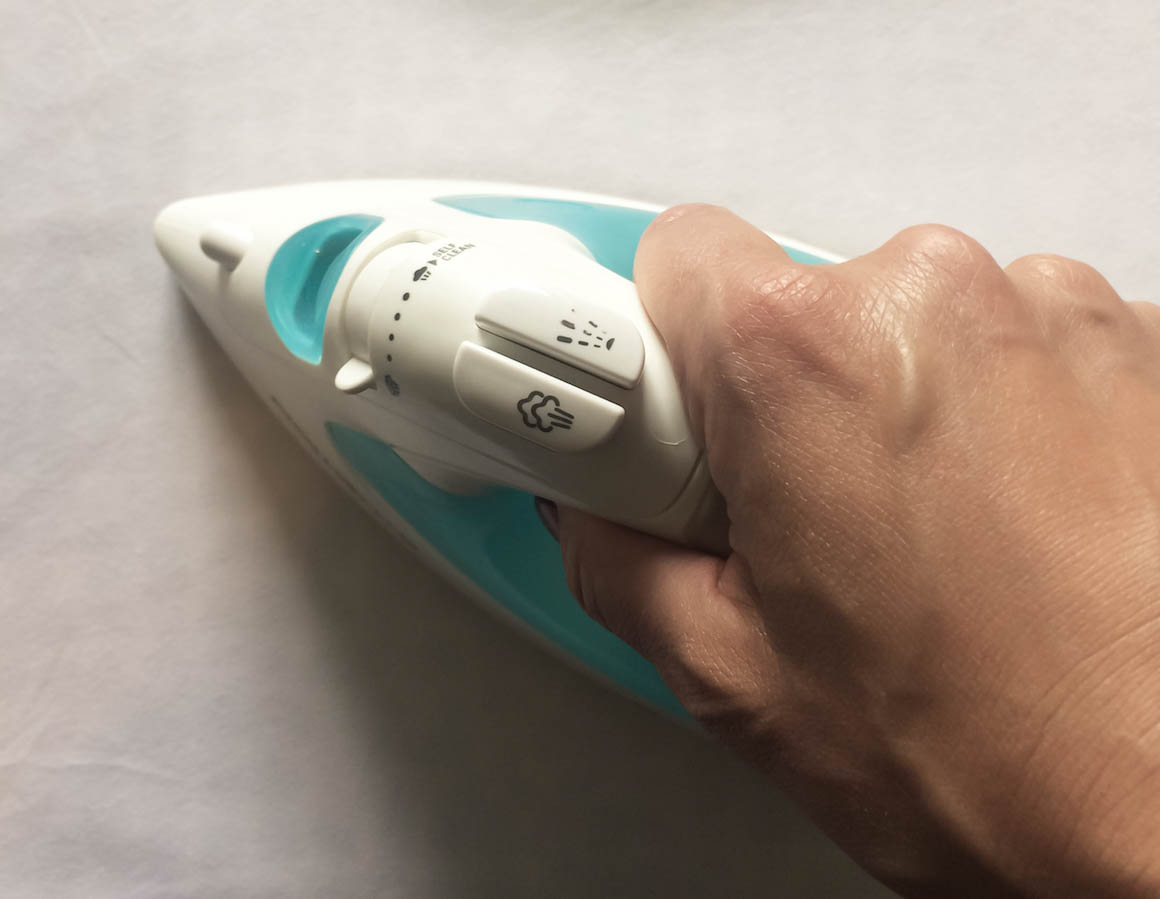 5. Prepare your t-shirt for the transfer by ironing it to make sure there are no wrinkles where you will place the print.
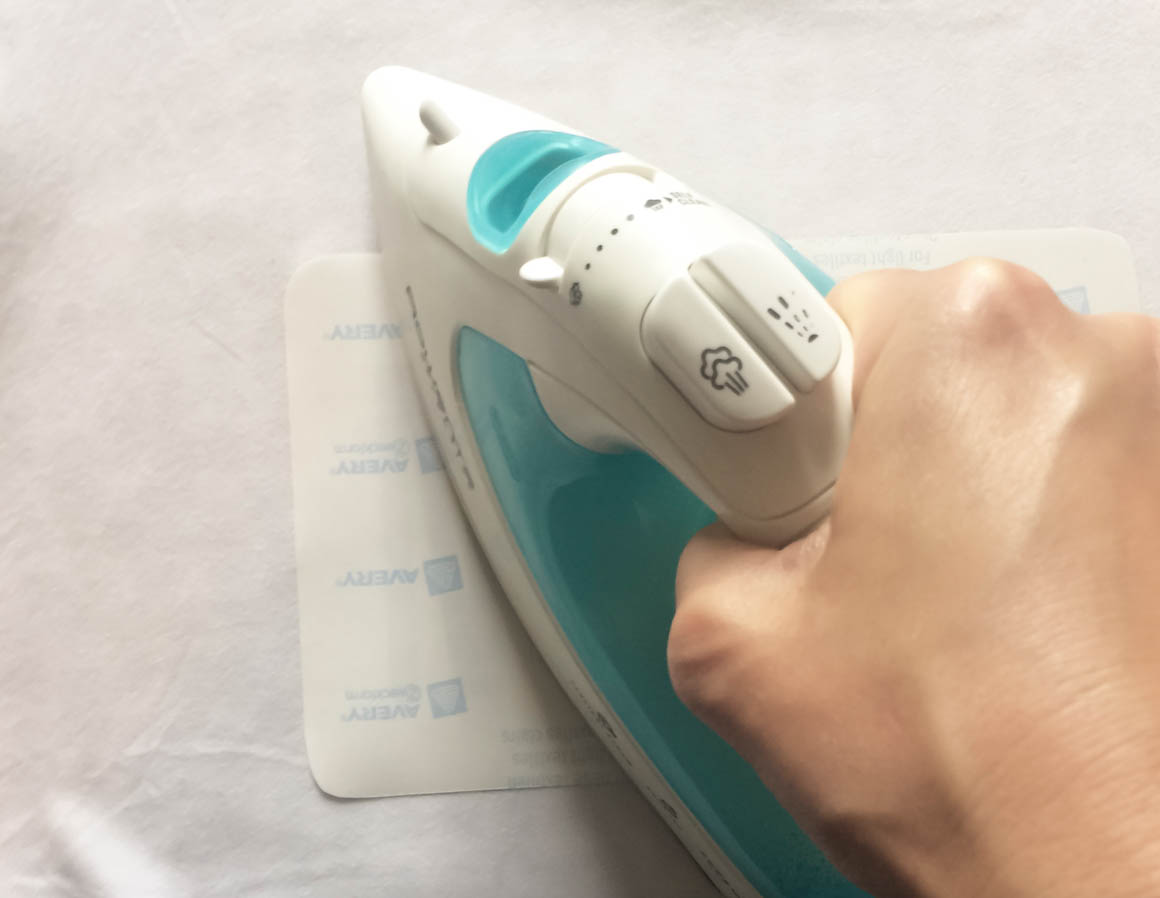 6. Place the t-shirt on a hard, flat and soft surface. Avoid using an iron board – it will give away for the pressure. Preheat the iron to make sure it has reached full heat (max 170 °C). Do not use steam. Place your transfer sheet on the t-shirt with the printed side down. Go over the sheet with the iron for it to set and not slide. Push down on the iron with both hands to apply pressure and move the iron slowly left to right over the transfer (about 20 seconds for each pass). Make sure you go over the edges. When you have covered the whole transfer you switch direction and start moving the iron top to bottom instead (about 20 seconds for each pass). When you’re done remove the t-shirt from the hot surface and let it cool down for at least two minutes. Then you can carefully peel of the top sheet.
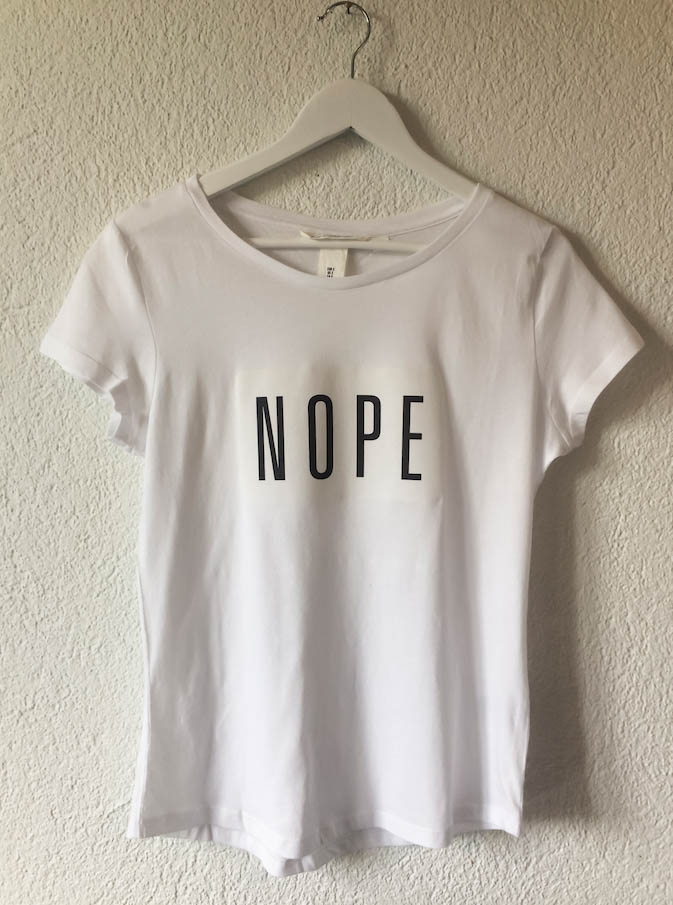 Et voilà! Your t-shirt is ready! Take care when you wash it; turn it inside out and use cold temperatures (30 °C).
Ps. the user instructions might vary between different brands of transfer sheets. Make sure to read through the instructions before you start.


No comment was written here yet.
Write the first comment and let us know what you think of the blog entry!